
BEST PRACTICES FOR INSTALLING ART
For some people, hanging art on their walls results in the type of anxiety that should be reserved for first dates and dentist appointments. It used to be the case for me too! Dinging up walls with nails and screws can be the first source of our nervousness around hanging art. “What if it doesn’t look good there!?” or “What if I mess up and pound 10 holes in my wall and still haven’t hung the picture up!?” I get it. I’ve been there. But, over the past couple of decades, I’ve become pretty adept at hanging art. Hopefully, some of the tips and tricks I share below will lessen your anxiety and the number of holes in your walls too!
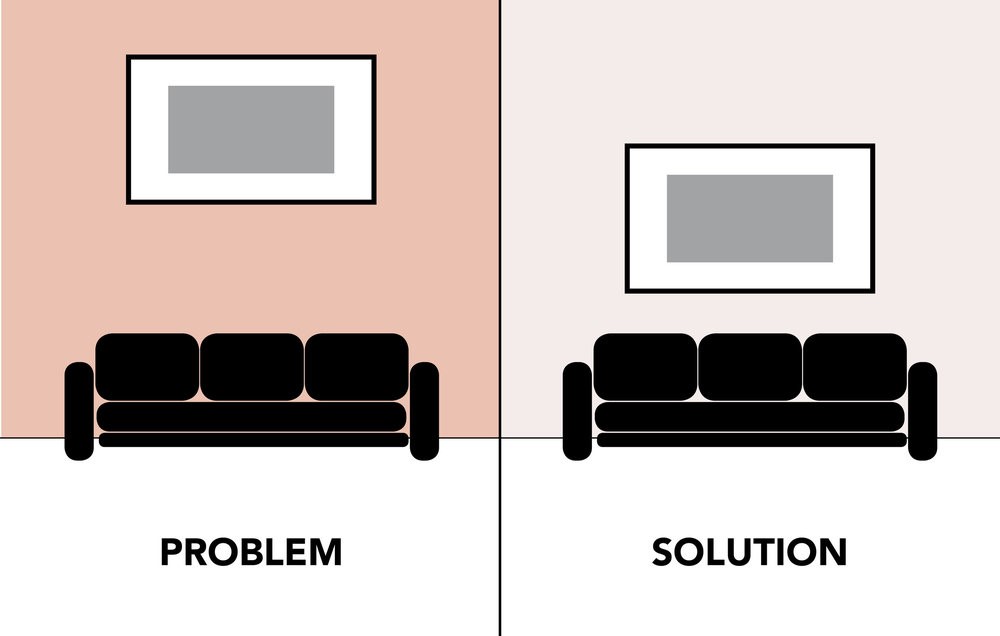
AVOID THIS AT ALL COSTS –
HANGING ART IS AN ART – Although hanging art is…well, sort of an “art” in itself, it can and should be fun, not stressful. My favorite part is deciding which art gets hung.
WHAT TO HANG? – Photos of the kids? A collage? A big painting purchased at a gallery one summer’s afternoon? Let me suggest taking all of your artwork including the framed photos you might want to hang and dividing them into categories. The first category includes the pieces you adore and want to see on your walls. The second category can be filler pieces. The final category consists of the things you should consider selling or giving away.
WHERE TO HANG IT? – Now that you’ve sorted out what you want to hang, you’re at one of the more challenging, and often anxiety-producing, steps in the process: “Where do I hang this, that and the other one?”
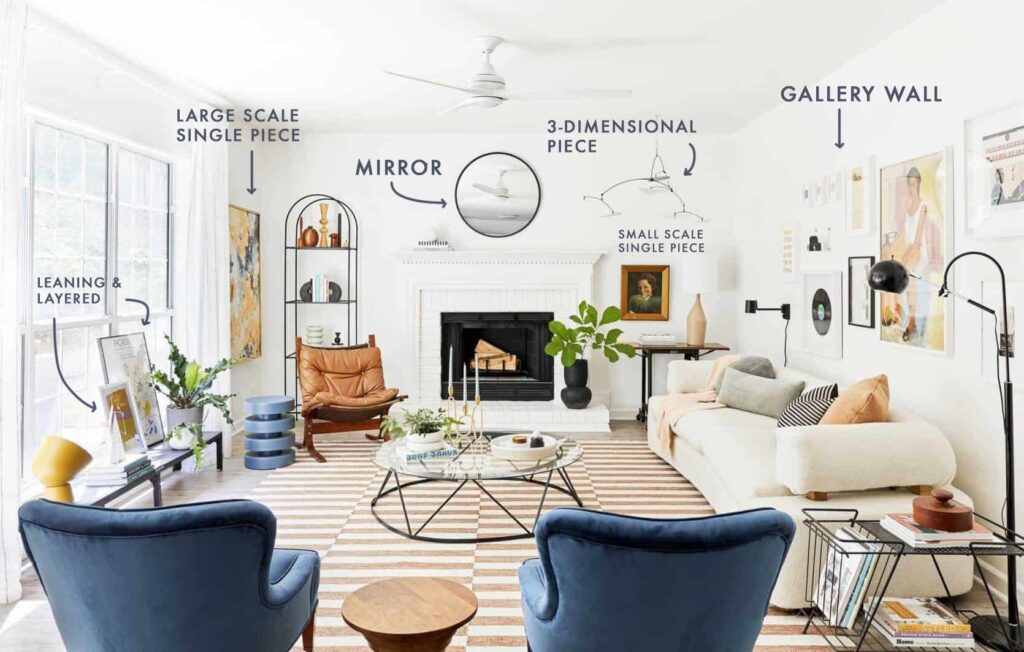
Here are a few tips and tricks for where things should go:
One large piece of art can work as a statement piece in a room. And the best place to hang your statement piece is on the priority wall or focal wall. Every room has one! Walk around each room in your house and determine which walls are just calling out for a big beautiful piece. As shown in the picture below, one large piece of art can also be defined as a series – a triptych or diptych, for example.
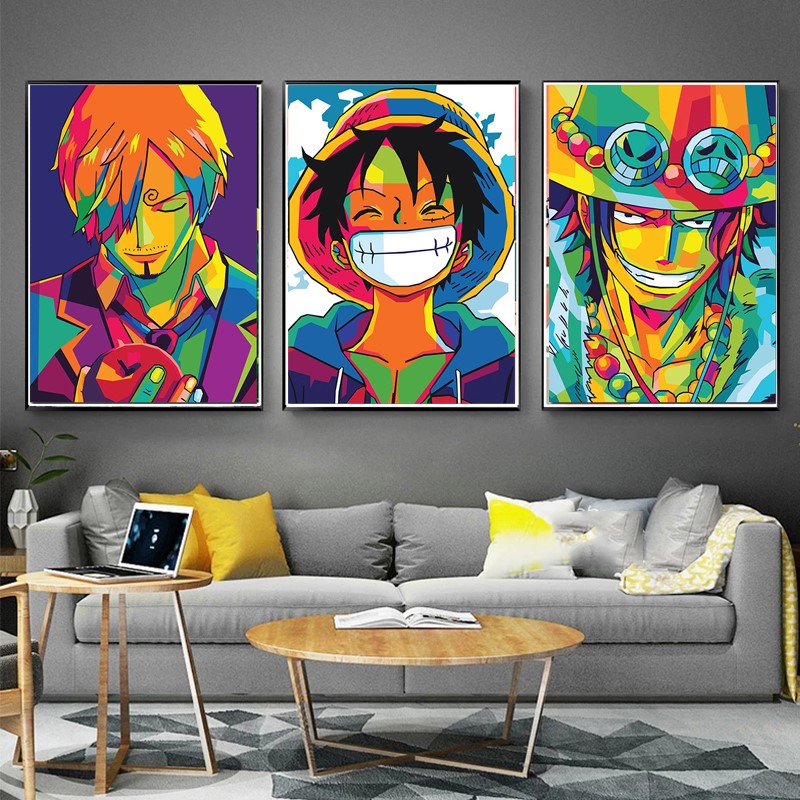
And please resist the urge to install disparate bits of artwork on any and every empty wall in the house. A few bare walls are lovely and help bring attention to the walls where your best art pieces and collages are.
HOT TIP! Remember to refrain from hanging art that has been framed under glass across from a window. It will constantly reflect whatever is outside and you won’t see the actual subject of the piece of art. Consider taking it to a framer and having non-reflective glass put in or hang something without glass like a more sculptural piece as shown below.
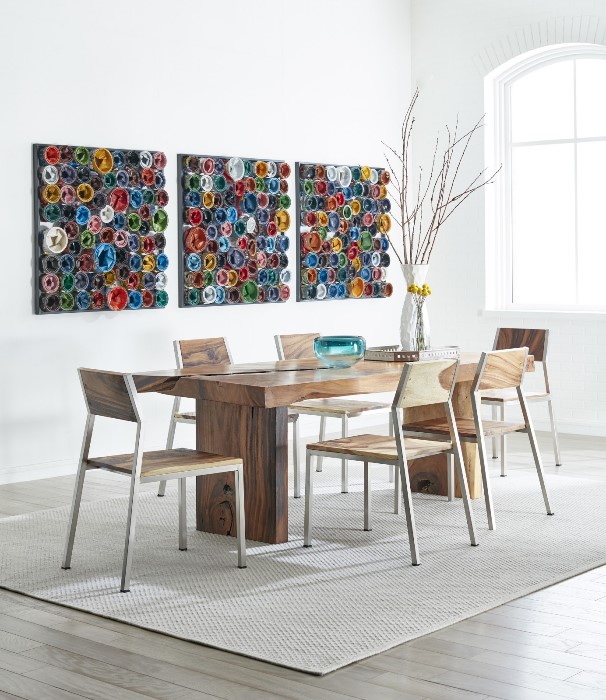
This sculptural art piece is made of recycled paint cans and it’s a definite conversation starter. You can feel good about helping the environment as well. I can place your order today – it also comes in larger sizes and there are many more sculptural-type art works where this came from.
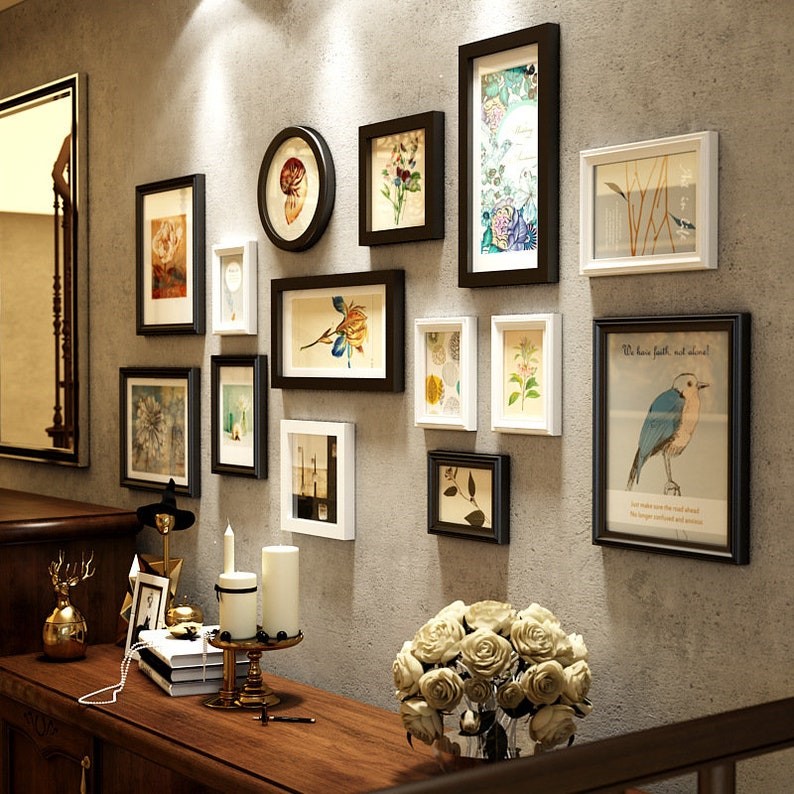
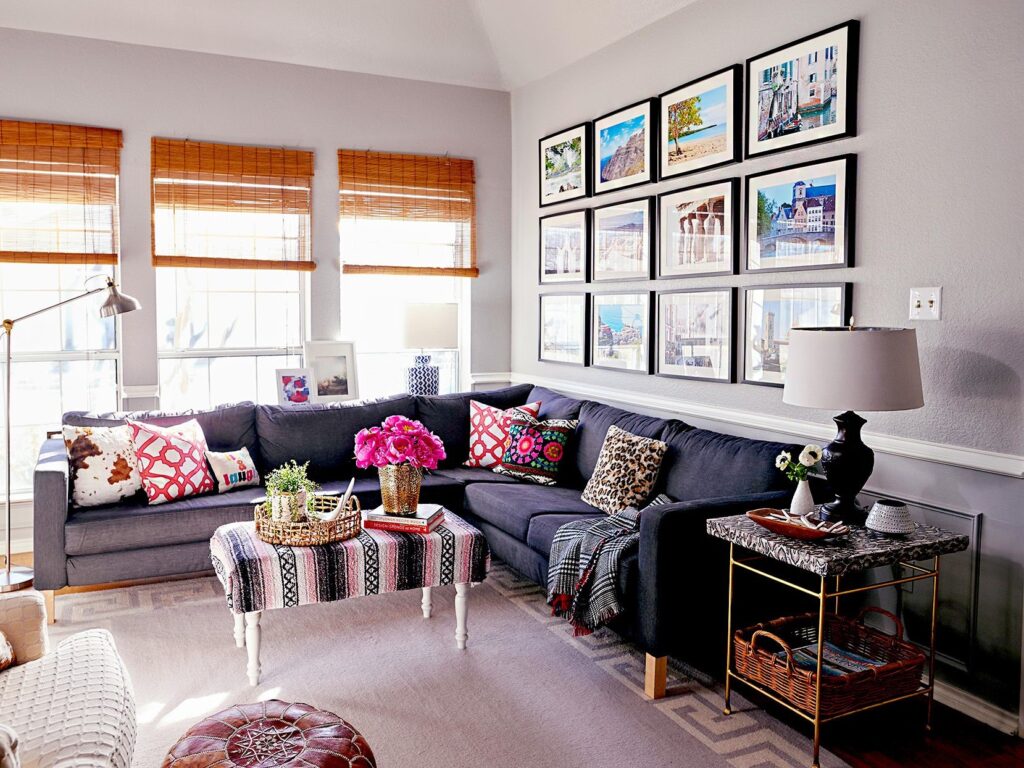
Although some designers advise keeping family photos separate from other artwork collages, you might like a cornucopia of art and photographs. Just make sure they hit the same theme – there should be some consistency in the overall design of the installation. Sometimes a wall of ski art plus a few photos of your kids skiing along with your third grader’s drawing of a ski lift can be fun and interesting. You can also create a themed collage using similar frames, similar perspectives within the art or a similar color story. HOT TIP: A true art collection includes different artists – do not make the mistake of purchasing all or most of your pieces from one artist. Broaden your horizons and explore – that’s the beauty of art!
PROPER PLACEMENT OF THE ART PIECES? – Although ceiling height does matter a bit, you should almost always hang your art so that the piece’s center (not the top!) is 57–60 inches from the floor. At this perfect height, the average adult can look at the work of art without tilting their head up.
HOW TO HANG IT? – So you have a few rough ideas as to where you want all of your artwork to go. Before committing to holes in the wall, try to lean your piece up or have someone hold it in the area where you want it to hang. If I’m creating a collage/gallery style wall, I like to lay the pieces I am going to install on the floor or on a large table so that I can make sure it’s a balanced composition. I can rearrange the pieces until I’m confident I like the design and I can measure all around each piece to make sure I place it correctly when transferring it to the wall.
A little trick that works well once you figure out where your piece(s) will hang is to create a template for it. Turn it over and place a long piece of painters tape across the back of the frame or canvas, extending from the hangers on the left to the hangers on the right. This will not work for framed art that hangs from a wire or with only one nail or screw. Now, mark the location of the hangers on the painters tape, remove the tape from the art piece and then place the tape on the wall at the appropriate height (as mentioned above). Make sure it’s level. Use the markings on your tape as the spots to hammer your nail or screw in. It works every time! Once you’ve placed your nail or screw, pull the tape off of the wall. This trick even works well if you’re hanging a collage – do the same for each piece that needs two holes, aiming to keep about 2 to 3 inches of space around each art piece.
We would love to help you arrange your art and install it as well. Just give us a call!